Inaturalist Account: What officials expect
Note: Based on publicly available guides; verify details on official sites.
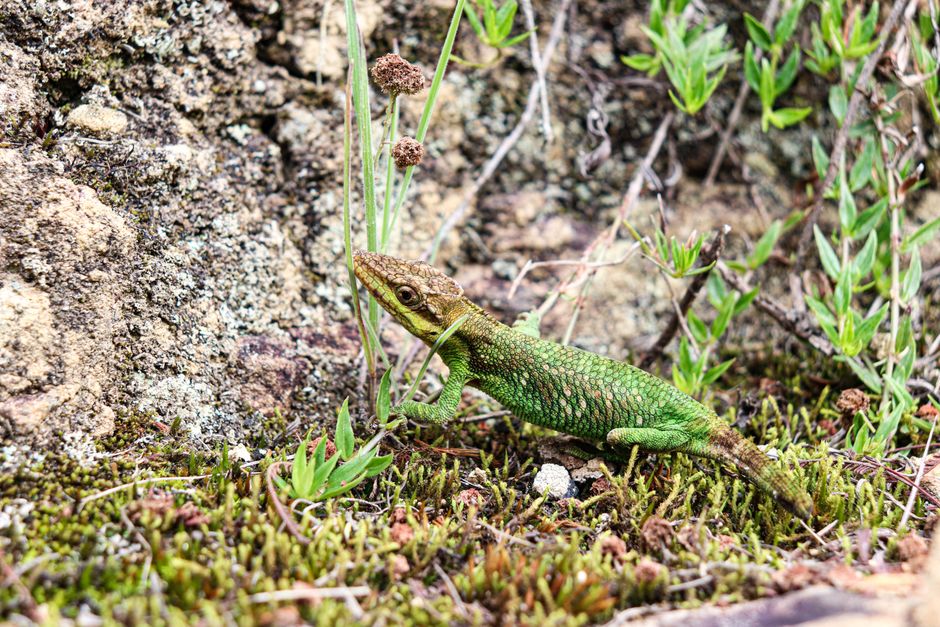
iNaturalist turns everyday nature walks into useful biodiversity records. If you want to join a citizen science nature app without overthinking gear or taxonomy, this field guide walks you from creating an account through your first verified observation.
I have used the same order below on phone and desktop, and it keeps the early mistakes small.
How to Prepare Before Creating an iNaturalist Account
Preparation is mostly about choosing how you will capture photos and where you will observe. You do not need a fancy camera; a clear smartphone photo of a plant, insect, or bird is enough to start.
Before iNaturalist registration, decide whether you will use the mobile app, the website, or both, because your login works across platforms once the account exists.
Gather a few basics: a working email address, a display name you are comfortable showing publicly, and location services enabled on your phone if you want automatic GPS on observations. If you plan to explore public land, skim outdoor access rules through USA.gov recreation and travel so you know permit or trail rules before you photograph species on federal or state sites.
Think about privacy early. iNaturalist can hide precise coordinates for sensitive species or personal locations. Setting that habit before your first upload saves later edits across dozens of records.
- Preparation item — What to check
- Capture device — Phone or camera with focus and enough light
- Network access — Wi‑Fi or mobile data for upload
- Location setting — GPS on for auto coordinates
- Public land rules — Trail, collection, and drone policies
Before You Apply / Consult
Most early frustration comes from skipped settings, not from biology knowledge.
People often create an account, upload ten photos, and only then notice their home address is visible on a backyard moth record. Review these points before you treat iNaturalist as a daily log.
Account type: Standard personal accounts fit nearly all observers. Organization accounts suit clubs or schools; pick that only if you are administering a group profile, not for a single personal log.
Location visibility: Observations default to public map pins. Use obscured or private geoprivacy for your yard, workplace, or rare species hotspots. You can change geoprivacy per observation or in bulk later, but fixing many records is tedious.
Photo licensing: Uploads can be shared with Creative Commons licenses that allow research reuse. Read the license summary on the upload screen so you know whether scientists can include your image in datasets.
Identification expectations: iNaturalist IDs are community-reviewed, not instant official verdicts. Your species name may start as a suggestion and change as others confirm or disagree. That is normal workflow, not a sign you failed.
Re-check list before your first outing: email verified, username set, app signed in, camera permissions granted, and geoprivacy understood. Five minutes here prevents an afternoon of retroactive edits.
Guide: How to Set Up iNaturalist Account
Creating an account takes a few minutes on the web or in the app. The same login works on iOS, Android, and inaturalist.org, so choose whichever screen is in front of you.
On the website: Open inaturalist.org, select Sign Up, and enter username, email, and password. Confirm your email when the message arrives; some features stay limited until verification completes.
Add a short profile bio and optional profile photo if you want your observations attributed clearly in project feeds.
In the mobile app: Install iNaturalist from your device app store, tap Sign Up, and use the same credentials you would on the web. Allow camera and location access when prompted so you can capture and geotag in one flow.
Sign in with Apple, Google, or Facebook: Third-party login is available, but linking a remembered email you control makes recovery easier if a provider changes policies.
Your account folder structure is logical once you see it in the app:
iNaturalist account
├── Profile (name, photo, bio)
├── Settings
│ ├── Account & password
│ ├── Privacy (geoprivacy defaults)
│ └── Notifications
├── Observations (your uploaded records)
├── Identifications (IDs you added for others)
└── Projects (joined local or topical lists)
After signup, open Settings and set default geoprivacy and license choice. Those two defaults affect every future observation until you change them.
If you participate in local biodiversity efforts tied to public programs, note that federal citizen science initiatives listed on USA.gov often partner with apps like iNaturalist for seasonal counts.
- Setup step — Where to do it
- Create login — Web Sign Up or app registration
- Set privacy defaults — Settings → Privacy
- Choose license — Settings or first upload screen
- Test capture — New Observation in app
How to Submit Wildlife Observations That Hold Up
A useful observation pairs identifiable evidence with date, location, and an honest ID attempt. Tap Observe or New Observation, photograph the organism in good light, and include multiple angles when possible—leaf and flower for plants, top and side for insects.
The app pulls GPS coordinates automatically when location is enabled. If you are offline, save the observation locally; it uploads when connectivity returns. Add a coarse ID such as “plants” or “beetles” if you are unsure; the community narrows it.
Write a short note about context: habitat, behavior, or host plant. That text helps identifiers and documents phenology for researchers using open biodiversity archives alongside collections described through Library of Congress natural history materials.
After upload, watch for comments or ID updates. Confirming others’ IDs when you agree builds reputation and trains your eye faster than solo guessing. Submit wildlife observations consistently, even of common species; abundance data matters as much as rarities.
Join an iNaturalist Project and Stay Involved
Projects group observations around a place, taxon, or event such as a bioblitz. Search Projects near your city or within a park boundary, read the rules, and tap Join. Future observations that match project filters appear on its leaderboard and export.
Local park districts and museum partners often run seasonal projects with simple targets: all pollinators in June, or shoreline plants after storms. Joining one channel keeps motivation high and gives your records immediate local use.
When you join iNaturalist project threads, follow posting guidelines about captive or cultivated organisms. Mark cultivated plants in yards so they do not skew wild counts.
If your town documents historical species shifts, compare your dated photos with archival field notes preserved by National Archives collections for long-term context—not to copy IDs, but to notice range or timing changes.
the social layer is optional. You can remain a quiet observer and still contribute valid data. Projects simply add structure if you like shared goals.
Pro Tips
Practical order beats random uploads when you are learning. Here is the sequence I wish I had used on day one.
Photograph first, identify second. Spend ten extra seconds framing the subject before chasing a name in a field guide. Clear evidence earns faster community IDs than a shaky guess typed upfront.
Batch edit at home. Field time is for capture; Wi‑Fi time is for cropping, checking geoprivacy, and adding tags. Doing both at once on a bright screen leads to mis-taps.
Use the compare tool. When iNaturalist suggests species, open Compare to view visually similar taxa side by side. That builds skills faster than accepting the top machine suggestion.
Log “research grade” criteria early. An observation reaches research grade when at least two-thirds of identifiers agree at species or finer level. Multiple photos, date, and location get you there; arguments in comments usually mean evidence was thin.
Back up photos outside the app. iNaturalist stores your uploads, but personal albums remain a safety net if you need to re-upload after account troubleshooting.
What Your iNaturalist Data Does in Citizen Science
iNaturalist feeds open research platforms and local land managers who track biodiversity trends. Verified observations export to the Global Biodiversity Information Facility and similar datasets scientists query for range maps, invasive species alerts, and climate timing studies.
Your username attaches to each record, but the scientific value is in the timestamped evidence chain: photo, coordinates, and community consensus. Public agencies and nonprofits use aggregated counts; they do not need access to your private messages.
That said, accuracy matters more than volume. One well-documented mushroom with habitat notes helps more than twenty blurry IDs marked “research grade” by accident after friendly agreement.
Treat the app as a shared notebook for the living world—useful because many people check the same page.
If you explore public lands while logging, keep checking current access guidance on official pages such as USA.gov recreation and travel before seasonal closures or permit changes affect where you can legally sample and photograph wild organisms.
You now have a working profile, a sane privacy baseline, and a repeatable capture routine. The next worthwhile milestone is ten research-grade records from one small area—you will notice patterns in your neighborhood biodiversity within a single month of casual walks.
Frequently Asked Questions
Do I need to know species names before I upload to iNaturalist?
You can start with a broad label like “bird” or “fungus” and let the community refine it. Take clear, well-lit photos from more than one angle, add date and location, and post.
Identifiers often suggest species within hours when evidence is strong.
Is an iNaturalist account free to create and use?
Creating an account and submitting observations is free on the website and mobile apps. There are no subscription fees for standard personal use.
Optional donations support the nonprofit platform, but they are not required to register or upload.
Can I hide my home location on wildlife observations?
Set default geoprivacy to obscured or private in Settings, or change visibility on individual records. iNaturalist also auto-obscures certain sensitive species coordinates.
Check the map preview before publishing if you photograph organisms in your yard or driveway.
What is the difference between iNaturalist and Seek by iNaturalist?
iNaturalist stores public or private observations tied to your account and shares them with researchers. Seek is a separate identification game-style app that does not publish your sightings to the iNaturalist database by default.
Use iNaturalist when you want dated, mappable records that count toward projects.
How do I join a local iNaturalist project after signup?
Search the Projects tab for your city, park, or topic, open the project page, and tap Join. Read any rules about date ranges or place boundaries.
Observations you upload that match the project filters will appear on its list automatically without re-entering data.
(Updated: 2026.07.20)
Got a question or tip we missed? Share it in the comments below—readers learn best from real experiences.


Comments
Post a Comment