[How to Apply for Tsa Precheck Online] Rules that trip people up…
Note: Based on publicly available guides; verify details on official sites.
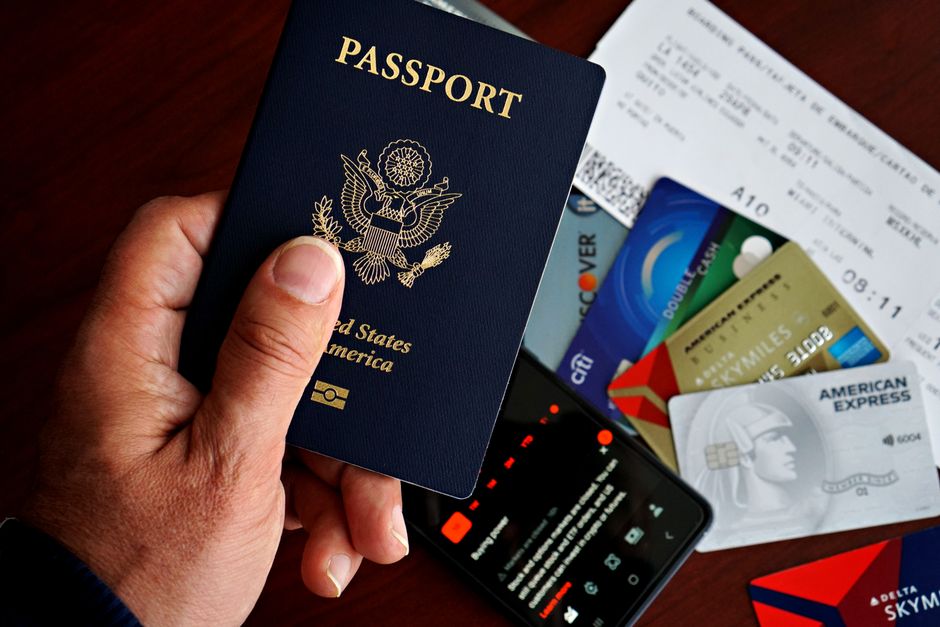
Before you start, follow this plain-English walkthrough for how to apply for tsa precheck online and confirm the latest steps on the official site. Ever sat in the long security line while PreCheck travelers walked past with shoes on and laptops still in their bags?
Learning how to apply for TSA PreCheck online is mostly about order: confirm eligibility, pre-enroll on an official portal, finish in person, then register your Known Traveler Number before you fly.
I treat this as a short field process, not a mystery. The online form is quick. The in-person visit is where documents, fingerprints, and payment actually lock the application in. if you reverse that order or use a non-.gov site, you waste a trip.
Phase 1: Prepare Documents Before You Start Online Pre-Enrollment
Timing for this phase is the day or two before you open any enrollment form. You save yourself a second visit when your ID, citizenship proof, and application name already match.
TSA PreCheck Requirements limit the program to U.S. citizens, U.S.
nationals, and lawful permanent residents. Applicants can be found ineligible for incomplete or false information, certain federal security violations, or disqualifying criminal offenses.
Read those rules on the official Transportation Security Administration site before you type anything into a portal.
Bring originals or certified copies — photocopies alone will not work at the counter. Names on every document must match the name you enter on the application.
If you legally changed your name, add an original or certified name-change document such as a marriage certificate or divorce decree.
List A documents can cover identity and citizenship in one item. Common List A examples include an unexpired U.S.
passport book or card, an unexpired Permanent Resident Card, or certain enhanced driver's licenses. If you do not have List A, bring two List B items: a valid photo ID plus proof of citizenship such as a U.S.
birth certificate or Certificate of Naturalization.
Need a passport first? Start with passport guidance on the U.S. Department of State , then return to PreCheck enrollment once that booklet is in hand.
Here's a simple folder layout I keep next to my laptop the night before pre-enrollment:
precheck-docs/
├── photo-id/
│ └── drivers-license-or-state-id
├── citizenship/
│ └── passport-OR-birth-certificate
└── name-change/ └── marriage-or-court-order (if needed)
So, organize the folder before you apply for TSA PreCheck online. You'll thank yourself when the enrollment specialist asks for papers in a specific order and you are not digging through a bag.
Phase 2: Start Online Pre-Enrollment to Apply for TSA PreCheck
Timing for this phase is when your documents are already in that folder — usually a five-minute form the same week you plan to visit a center. Online pre-enrollment starts The TSA PreCheck Application; it does not finish it.
Open the official tsa gov precheck page from TSA.gov and choose an authorized enrollment provider: CLEAR, IDEMIA, or Telos. Together they operate more than a thousand enrollment locations. Pick the provider with a center near home or work so you actually show up.
Enter personal details carefully and schedule an appointment if your location offers one. Many centers also accept walk-ins. TSA states the online portion takes about five minutes and the in-person visit about ten when paperwork is ready.
the biggest portal quirk is payment timing. First-time applicants are not asked for payment information online.
Any site that claims you can fully register and pay for first-time PreCheck without ending in .gov is not an official TSA PreCheck website. Stay on authorized .gov workflows only.
That said, save your confirmation email and appointment code. Enrollment staff will look up your pre-enrollment record at the counter.
If you need a broader map of federal travel services while you plan, USA.gov points you back to official agency pages without third-party middlemen.
Before You Head to the Airport
Timing for this checkpoint is right after you draft the online form and before you leave for the enrollment center. A short re-check prevents the most common denials and no-shows.
Misread rules show up often. Children 17 and under can use PreCheck lanes with an enrolled adult when the indicator appears on the child's boarding pass — they do not need a separate adult membership for that scenario.
You also do not need a new PreCheck application if you already hold active Global Entry, NEXUS, SENTRI, TWIC, or a CDL with a hazardous materials endorsement.
Denial reasons usually track back to eligibility, accuracy, or documents — not to how fast you filled the form. Incomplete applications, name mismatches, and disqualifying offenses are the patterns TSA highlights.
If a prior application was denied, read the provider notice carefully before you reapply.
Re-check list before you drive over:
- Citizenship or LPR status matches program eligibility
- Application name matches every document exactly
- Originals or certified copies are in your folder
- Provider was chosen from the official TSA enrollment list
- You did not enter card details on a first-time online form
- You are not already covered by another Trusted Traveler program
Ever lost track of whether Global Entry already includes PreCheck? If you fly abroad often, pause here and compare programs in the last section before you pay twice for overlapping benefits.
Pro tips
Timing for these tips is mid-process — after pre-enrollment, before and during the center visit. Small bottlenecks slow people more than the background check itself.
Document order at the counter matters. Put photo ID on top, citizenship proof next, and name-change papers last. Enrollment specialists process a steady stream of applicants; a neat stack moves faster than a stuffed tote.
Portal quirks to watch: provider pricing differs, appointment slots fill at airport centers on busy travel weeks, and walk-in wait times vary by location. Compare hours on the official provider pages linked from TSA before you commit to a Saturday morning rush.
Give yourself buffer before a major trip. TSA notes many applicants receive a Known Traveler Number in about three to five days, while some cases take longer — up to about 60 days in slower situations. Starting two weeks before travel removes stress if vetting needs extra review.
After approval, add your KTN to every airline profile you use, not only one loyalty account. That is the step people skip, then wonder why the boarding pass still lacks the PreCheck indicator. You'll thank yourself when the lane opens and your pass already shows it.
Phase 3: Finish In-Person Enrollment and Pay the Fee
Timing for this phase is your appointment day or walk-in window after online pre-enrollment is complete. This is when biometrics, document checks, and payment turn the draft into a submitted application.
At the center, staff verify your documents, take fingerprints and a photo, then collect the fee. Plan roughly ten minutes at the counter if your folder is ready. Payment methods depend on the provider — ask which cards or other methods that location accepts before you arrive.
Enrollment providers set their own prices. Enter your travel dates and location on the official screen and confirm current fees there before you go.
Recent published new-enrollment rates for a five-year membership include examples such as IDEMIA at $76.75 and Telos at $85.00; CLEAR offers separate bundled options with their own terms.
- Category — Amount
- IDEMIA new enrollment — $76.75
- Telos new enrollment — $85.00
- Global Entry (CBP) — $120.00
- PreCheck renewal (example) — Provider-set
The fee is non-refundable even if the application is denied. TSA does not price-match across providers. Pick the location and rate that fit your schedule, finish biometrics, and wait for the provider email with your status.
Phase 4: After Approval — Register Your KTN and Check Boarding Passes
Timing for this phase starts the day your approval email arrives and continues each time you book a flight. Enrollment alone does not print the PreCheck mark — your airline needs the number.
Copy your Known Traveler Number into airline loyalty profiles and into the KTN field on every reservation. Then check the boarding pass before you leave for the airport.
If the PreCheck indicator is missing, update the reservation or profile and reissue the pass when the airline allows it.
Use dedicated lanes only when the indicator appears on that boarding pass. Participating airports are widespread, but the lane still depends on correct KTN linking. Set a calendar reminder about six months before membership expiration so renewal does not lapse mid-travel season.
Renewal is often cheaper than first-time enrollment and may be available online through your original provider. Keep the same document folder for renewals; name changes still need certified proof.
That habit keeps the next five years as boring — and as smooth — as you want them to be.
Compare Programs When International Trips Shape Your Choice
Timing for this comparison is before you pay any Trusted Traveler fee, especially if you leave the country more than a few times a year.
A TSA PreCheck vs Global Entry compare is really about which part of the trip slows you down.
TSA PreCheck speeds security screening for departures from U.S. airports: shorter lines, shoes and belt usually stay on, and liquids and laptops often stay in your bag when the lane rules allow.
Global Entry adds expedited CBP processing when you return from abroad — think kiosk or app clearance instead of the standard immigration queue — and includes PreCheck automatically if approved. So you are not stacking two separate memberships; Global Entry already covers the domestic screening perk.
How to line the two programs up side by side
treat the choice like a simple attribute check, not a marketing pitch. Put your real travel pattern next to what each program actually changes:
- Where the time savings show up — PreCheck helps on the way out of a U.S. airport; Global Entry helps on the way back into the U.S., plus PreCheck on departures.
- How often you cross a border — TSA suggests considering Global Entry when you take about four or more international trips a year; for fewer international flights, standalone PreCheck is usually the lighter path.
- What you pay for — one Trusted Traveler fee buys one program's benefits for its enrollment term, so pick before you checkout rather than upgrading after the fact out of guesswork.
- What you still do either way — online pre-enrollment, an in-person appointment, and the same habit of keeping ID and supporting documents ready.
That said, if most of your year is domestic hops with one vacation abroad, PreCheck alone usually matches the bottleneck you feel at security. If you land at a U.S.
port of entry several times a year and dread the immigration hall as much as the checkpoint, Global Entry is the fuller fit — and you still get PreCheck without a second application.
choose the program that matches how you actually fly, not the one that sounds more premium on paper. Then return to Phase 2, finish the online pre-enrollment, and keep your document folder ready for the in-person visit — the practical path from form to boarding-pass indicator.
You'll thank yourself when the comparison is already settled and you are not second-guessing the fee at the payment screen.
(Updated: 2026.07.20)
Frequently Asked Questions
How long does TSA PreCheck take after the in-person appointment?
Many applicants hear back in about three to five days after fingerprints and payment are collected. Some cases take longer while TSA finishes vetting, so build a little buffer before a big trip.
When the approval email arrives, add your Known Traveler Number to airline profiles right away so the PreCheck mark can show on your next boarding pass.
Can first-time applicants pay the TSA PreCheck fee online?
First-time applicants pay at the enrollment center during the in-person visit. TSA states you should not be asked for payment details during online pre-enrollment.
Complete the short form on an authorized .gov provider site, bring your documents, and pay with the methods that location accepts.
What documents do I need to finish TSA PreCheck enrollment?
Bring original or certified identity and citizenship documents with names that match your application exactly. An unexpired U.S.
passport often covers both needs in one item. Without a List A document, bring a valid photo ID plus proof of citizenship such as a birth certificate or naturalization certificate, plus name-change papers if your legal name changed.
Do I need TSA PreCheck if I already have Global Entry?
No separate PreCheck application is required while Global Entry is active, because Global Entry includes PreCheck benefits. Apply for standalone PreCheck when you do not already hold Global Entry, NEXUS, SENTRI, or another program that already provides the screening benefit.
Compare trip patterns first so you do not pay twice for overlapping coverage.
Where should I start if I want to apply for TSA PreCheck online?
Begin on the official TSA PreCheck pages at TSA.gov and choose CLEAR, IDEMIA, or Telos as your enrollment provider. Fill out the short pre-enrollment form, pick a nearby center, then finish fingerprints, document checks, and payment in person.
After approval, register your Known Traveler Number on every airline profile you use and confirm it on the boarding pass before you fly.
Official References for Tsa Precheck Online
The steps below are cross-checked against 1 official reference.
- TSA offers reference material you can cross-check for this topic.
Official criteria may update — double-check each source before you rely on it.
Got a question or tip we missed? Share it in the comments below—readers learn best from real experiences.


Comments
Post a Comment